
3D printing for beginners can feel overwhelming at first. The technology has evolved dramatically, and prices have dropped enough that anyone can own a capable machine for a few hundred dollars. This guide breaks down everything new users need to know, from how the technology works to picking the right printer and creating successful first prints. Whether someone wants to make custom parts, artistic creations, or practical household items, 3D printing opens up real possibilities. Let’s get into it.
Table of Contents
ToggleKey Takeaways
- 3D printing for beginners is more accessible than ever, with reliable entry-level printers available between $200 and $400.
- FDM (Fused Deposition Modeling) printers offer the best starting point for beginners due to ease of use and lower costs.
- PLA filament is the ideal material for new users—it prints at lower temperatures, warps less, and comes in many colors.
- Free model repositories like Thingiverse and Printables let beginners practice 3D printing skills before learning design software.
- Proper bed leveling and nailing the first layer are critical steps that determine print success or failure.
- Joining online communities like Reddit’s r/3Dprinting provides fast troubleshooting help and accelerates the learning curve.
What Is 3D Printing and How Does It Work
3D printing builds physical objects from digital files by adding material layer by layer. This process is also called additive manufacturing. Unlike traditional methods that cut away material, 3D printing deposits it precisely where needed.
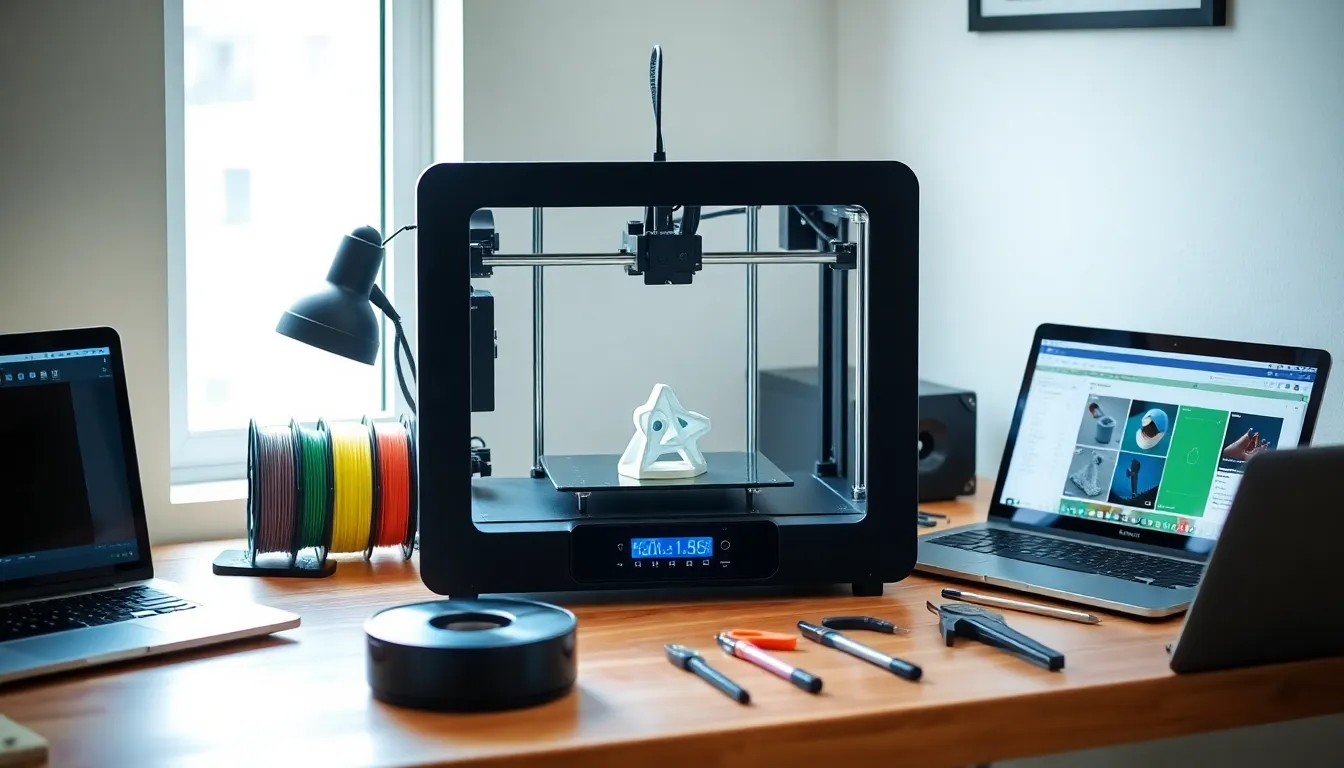
The most common technology for beginners is FDM (Fused Deposition Modeling). An FDM printer heats plastic filament until it melts, then pushes it through a nozzle. The nozzle moves along X, Y, and Z axes, laying down thin layers that stack up to form the final object. Each layer is typically 0.1mm to 0.3mm thick.
Here’s the basic workflow:
- Design or download a 3D model (usually a .STL or .OBJ file)
- Import the model into slicing software (this converts the design into printer instructions)
- Transfer the sliced file to the printer (via USB, SD card, or Wi-Fi)
- The printer executes the instructions layer by layer
- Remove and finish the completed print
Resin printing (SLA/MSLA) offers another option. It uses UV light to cure liquid resin into solid shapes. Resin printers produce finer details but require more post-processing and safety precautions. For most beginners, FDM 3D printing provides the best starting point.
Choosing Your First 3D Printer
Selecting a first 3D printer depends on budget, intended use, and willingness to tinker. The good news: entry-level machines have improved significantly. Beginners can find reliable options between $200 and $400.
Key factors to consider:
- Build volume – This determines maximum print size. A 220x220x250mm bed handles most hobby projects.
- Print bed type – Heated beds with PEI or textured surfaces help prints stick and release easily.
- Assembly required – Some printers come pre-assembled: others need several hours of setup.
- Community support – Popular models have active forums, tutorials, and troubleshooting guides.
Popular beginner 3D printers include the Creality Ender 3 series, Anycubic Kobra, and Bambu Lab A1 Mini. The Ender 3 has been a go-to recommendation for years due to its low cost and massive community. Bambu Lab printers cost more but offer easier setup and automatic calibration features.
3D printing for beginners works best when the first machine is forgiving and well-documented. Avoid the cheapest no-name options, they often create more frustration than value. Spending an extra $50-100 on a proven model saves headaches later.
Essential Materials and Filaments
Filament is the raw material for FDM 3D printing. It comes on spools and feeds into the printer during operation. Choosing the right filament affects print quality, strength, and appearance.
PLA (Polylactic Acid) is the standard choice for beginners. It prints at lower temperatures (190-220°C), doesn’t require a heated bed (though one helps), and produces minimal warping. PLA is biodegradable and comes in countless colors. Most 3D printing beginners should start here.
PETG offers improved durability and heat resistance compared to PLA. It prints at slightly higher temperatures and handles functional parts better. PETG is food-safe when printed correctly.
ABS provides strength and heat resistance but requires an enclosed printer and good ventilation. It releases fumes during printing. Most beginners skip ABS initially.
Other supplies to have on hand:
- Isopropyl alcohol for bed cleaning
- Painter’s tape or glue stick for bed adhesion
- Flush cutters for removing supports
- Scraper or spatula for print removal
- Digital calipers for measuring
Filament quality matters. Cheap spools often have inconsistent diameter or moisture issues that cause print failures. Brands like Hatchbox, Polymaker, and Overture offer consistent results at reasonable prices. Store filament in dry conditions, moisture absorption causes bubbling and weak prints.
Finding and Creating 3D Models
3D printing requires digital models. Beginners have two main paths: download existing designs or create their own.
Free model repositories:
- Thingiverse – The largest free collection, though search can be frustrating
- Printables – Clean interface with quality ratings and tested designs
- Thangs – Good search engine that indexes multiple sites
- MyMiniFactory – Focuses on gaming miniatures and artistic pieces
Thousands of practical items exist: phone stands, cable organizers, replacement parts, toys, and decorations. Downloading tested models lets beginners focus on 3D printing skills before tackling design.
Creating original models:
For custom designs, CAD (Computer-Aided Design) software is necessary. Beginner-friendly options include:
- Tinkercad – Free, browser-based, uses simple shape combinations
- Fusion 360 – Free for hobbyists, professional-grade features
- Blender – Free, powerful for organic shapes, steep learning curve
Tinkercad works well for basic functional parts. Users drag and drop primitive shapes, then combine or subtract them. Someone can learn the basics in an afternoon.
Slicing software converts models into printer instructions. Cura (free), PrusaSlicer (free), and Bambu Studio handle this step. These programs let users adjust layer height, infill percentage, print speed, and support structures. Default profiles work for most beginner 3D printing projects.
Tips for Successful First Prints
First prints often fail. That’s normal. These tips help beginners avoid common mistakes and build skills faster.
Level the bed properly. An unlevel print bed causes adhesion problems on the first layer. Many printers include manual leveling with paper, the nozzle should barely drag against it. Auto-leveling printers simplify this process but still need occasional calibration.
Start with simple test prints. Calibration cubes, benchies (small boat models), and temperature towers reveal printer performance. Don’t jump straight into complex models. Master the basics of 3D printing first.
Get the first layer right. The first layer determines success. Watch it go down. Filament should squish slightly into the bed without gaps or excessive smearing. Adjust Z-offset if needed.
Use appropriate settings:
- 0.2mm layer height balances speed and quality
- 15-20% infill works for most decorative prints
- 50mm/s print speed is safe for beginners
- Enable supports for overhangs above 45 degrees
Control the environment. Drafts cause warping, especially with larger prints. Keep the printer away from open windows and AC vents. Some users build enclosures for better temperature stability.
Join a community. Reddit’s r/3Dprinting, manufacturer forums, and Discord servers provide fast help. Someone has already solved whatever problem a beginner encounters. 3D printing for beginners becomes much easier with community support.
Document failures. Take photos of failed prints. Patterns emerge that reveal underlying issues, bed adhesion, retraction settings, or temperature problems.