This 3D printing guide covers the basics every beginner needs to start creating physical objects from digital designs. 3D printing transforms a computer model into a solid object by building it layer by layer. The technology has moved from industrial factories into home workshops, schools, and small businesses. Whether someone wants to print replacement parts, custom gifts, or prototype inventions, understanding the fundamentals saves time and frustration. This guide explains how 3D printing works, which printer types suit beginners, what materials to use, and how to set up a successful first print.
Table of Contents
ToggleKey Takeaways
- This 3D printing guide recommends FDM printers for beginners due to their affordability, ease of use, and lower ongoing costs.
- PLA filament is the best starting material because it prints at lower temperatures, warps less, and forgives beginner mistakes.
- Proper bed leveling and first-layer adhesion are critical—watch the first few layers closely to catch problems early.
- Use slicing software like Cura or PrusaSlicer to convert 3D models into printable G-code instructions.
- Start with simple calibration prints before attempting complex projects to learn the basics without wasting time on failures.
- Quality filament from reputable brands prevents more failed prints than cheap alternatives save in cost.
How 3D Printing Works
3D printing builds objects by adding material in thin layers. A digital file tells the printer where to place each layer. The process starts with a 3D model created in design software or downloaded from online libraries like Thingiverse or Printables.
The model gets processed through slicing software. This program cuts the design into hundreds or thousands of horizontal layers. It also generates instructions (called G-code) that control the printer’s movements, temperatures, and speeds.
During printing, the machine follows these instructions precisely. Most consumer 3D printers use a heated nozzle that melts plastic filament and deposits it onto a build plate. Each layer fuses to the one below it. Layer by layer, the object takes shape.
The entire 3D printing process can take anywhere from 30 minutes for a small item to 20+ hours for larger, detailed prints. Print time depends on object size, layer height, and print speed settings.
Understanding this workflow helps beginners troubleshoot problems. If a print fails, the issue usually traces back to the model, the slicer settings, or the printer hardware.
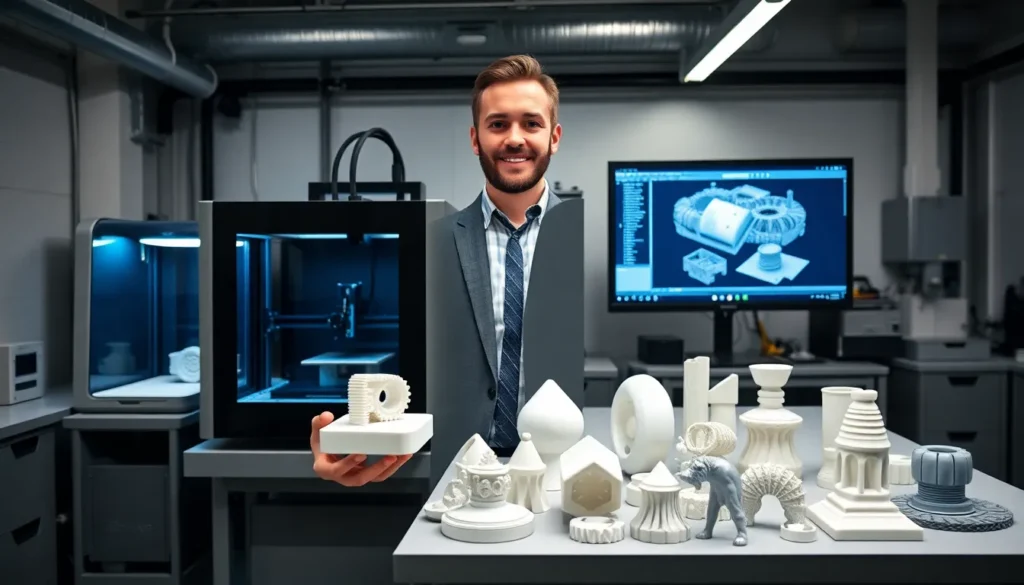
Types of 3D Printers for Beginners
Beginners should understand two main 3D printer technologies: FDM and resin printing.
FDM (Fused Deposition Modeling)
FDM printers melt plastic filament and extrude it through a nozzle. They’re the most popular choice for beginners because they’re affordable, easy to use, and work with inexpensive materials. Entry-level FDM printers cost between $150 and $400.
Popular beginner FDM printers include the Creality Ender 3 series, Anycubic Kobra, and Bambu Lab A1 Mini. These machines offer good print quality and large online communities for support.
FDM printers excel at functional parts, prototypes, and larger objects. They produce visible layer lines, which some users sand or paint for a smoother finish.
Resin Printers (SLA/MSLA)
Resin printers use liquid photopolymer that hardens when exposed to UV light. They produce incredibly detailed prints with smooth surfaces. This makes them ideal for miniatures, jewelry, and dental models.
But, resin 3D printing requires more post-processing. Prints need washing in isopropyl alcohol and curing under UV light. The resin itself is messier and requires proper ventilation. Beginners often start with FDM, then add a resin printer later.
For a first 3D printer, FDM offers the easiest learning curve and lowest ongoing costs.
Essential Materials and Filaments
Choosing the right filament affects print quality and success rate. Here are the most common materials in 3D printing:
PLA (Polylactic Acid)
PLA is the best filament for beginners. It prints at lower temperatures (190-220°C), doesn’t require a heated bed, and produces minimal warping. PLA comes from plant-based materials, making it more environmentally friendly than petroleum-based plastics.
Most 3D printing guide resources recommend starting with PLA. It’s forgiving, affordable, and available in dozens of colors.
PETG
PETG offers better strength and temperature resistance than PLA. It’s a good middle ground between easy printing and functional durability. PETG works well for parts that need to withstand stress or mild heat.
ABS
ABS is strong and heat-resistant but challenging to print. It requires higher temperatures, an enclosed printer, and proper ventilation due to fumes. Most beginners skip ABS until they have more experience.
TPU
TPU produces flexible, rubber-like prints. It’s useful for phone cases, gaskets, and shock absorbers. Printing TPU requires slower speeds and specific settings.
Beginners should buy quality filament from reputable brands. Cheap filament causes more failed prints than it saves in cost. Store filament in dry conditions, as moisture degrades print quality.
Setting Up Your First Print
Follow these steps for a successful first 3D printing experience:
1. Assemble and Level the Printer
Most printers ship partially assembled. Follow the manufacturer’s instructions carefully. Proper bed leveling is critical, the nozzle must maintain consistent distance from the build plate across the entire surface. Many modern printers include automatic bed leveling.
2. Install Slicing Software
Download a slicer like Cura, PrusaSlicer, or the software your printer manufacturer provides. Import your printer’s profile or configure the settings manually.
3. Choose a Simple First Model
Don’t attempt a complex print immediately. Start with a calibration cube or a simple object like a phone stand. These quick prints teach the basics without wasting hours on potential failures.
4. Configure Slicer Settings
For PLA, set the nozzle temperature to 200-210°C and bed temperature to 60°C. Use a layer height of 0.2mm for a balance of speed and quality. Enable a brim or raft if adhesion seems weak.
5. Start the Print and Monitor
Watch the first few layers closely. The first layer is the most critical, it must stick firmly and lay down evenly. If the first layer looks good, the rest usually follows.
Every 3D printing guide emphasizes patience during this learning phase. Expect some failures. Each one teaches something valuable.
Common Mistakes and How to Avoid Them
New 3D printing users make predictable mistakes. Here’s how to sidestep the most common ones:
Poor Bed Adhesion
Prints that pop off the bed mid-print frustrate everyone. Clean the build surface with isopropyl alcohol before each print. Ensure proper bed leveling. Use a glue stick or hairspray for extra grip if needed. Printing too fast or with a nozzle too far from the bed causes adhesion failures.
Incorrect Temperature Settings
Every filament brand prints differently. If prints show stringing (thin threads between parts) or poor layer bonding, adjust temperature in 5°C increments. Print a temperature tower to find the ideal setting for each filament.
Skipping Calibration
Rushing past calibration leads to dimensional inaccuracies and failed prints. Take time to calibrate e-steps, flow rate, and bed leveling properly. Calibration cubes and test prints reveal problems before they ruin larger projects.
Using Low-Quality STL Files
Not every downloadable model prints well. Look for designs with good reviews and proven print success. Check that the model is watertight and properly scaled before slicing.
Ignoring Supports
Overhangs greater than 45 degrees need support structures. The slicer can generate these automatically. Forgetting supports leads to droopy, failed prints.
Impatience
3D printing takes time. Increasing speed too much sacrifices quality. Let parts cool before removing them from the bed. Rushing creates more problems than it solves.